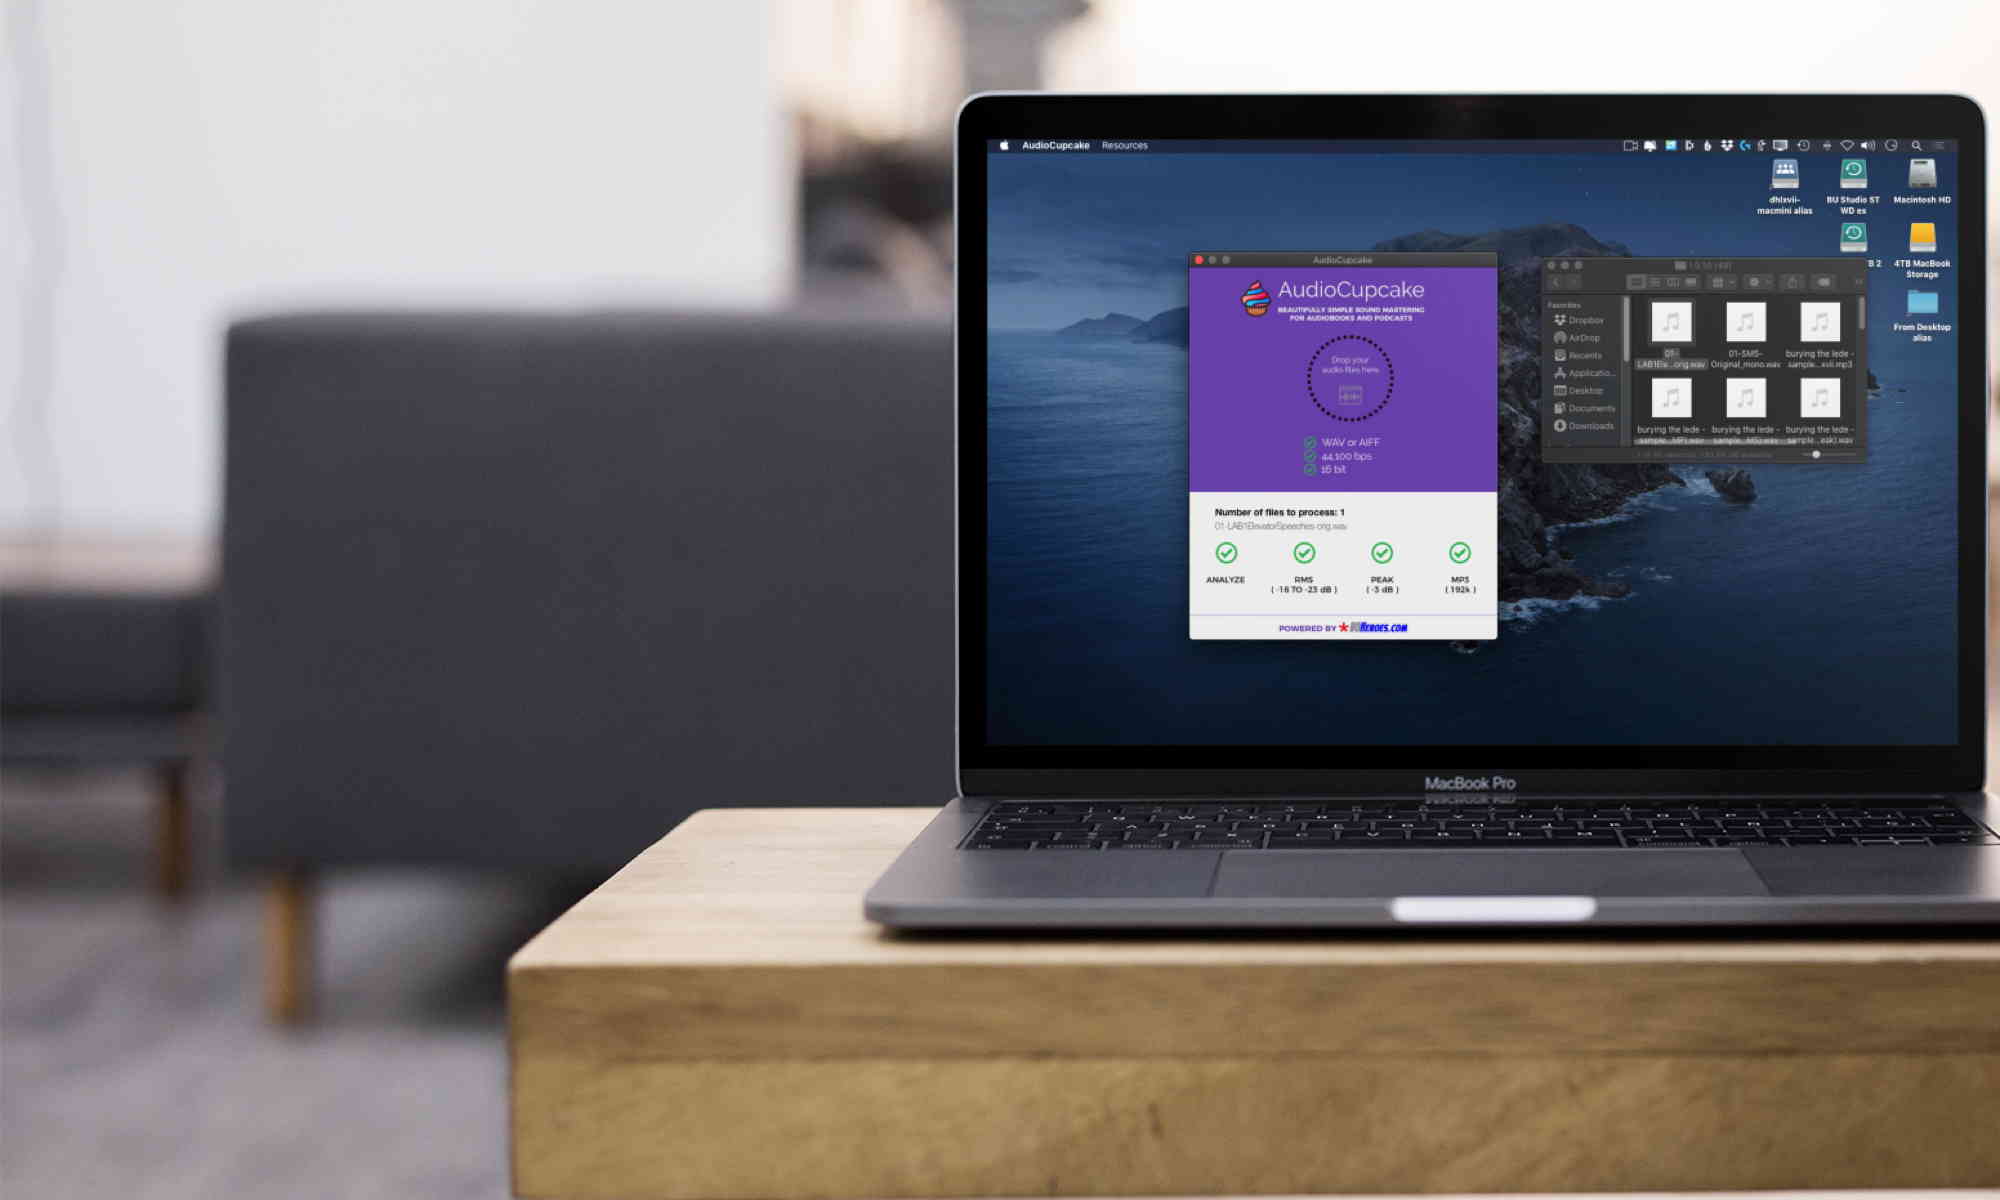
Need help with AudioCupcake?
- What is AudioCupcake?
- Is AudioCupcake free?
- Is AudioCupcake just like The Levelator?
- With what versions of MacOS does AudioCupcake work properly?
- Is there a Windows version of AudioCupcake?
- What’s the difference between the free and premium versions of AudioCupcake?
- How do I download and install AudioCupcake?
- I’m one of David’s VO students. Do I get the premium version of AudioCupcake for free?
- How do I upgrade to the Premium version of AudioCupcake?
- I just got a new Mac. How do I enter a license code I already have to upgrade to the Premium version of AudioCupcake?
- How do I use AudioCupcake?
- What are all those extra file AudioCupcake creates, and how do I get rid of them?
- Do you have any other questions?
What is AudioCupcake?
AudioCupcake is a simple, elegant Macintosh software program designed to be used by audiobook narrator/producers and podcasters to make their audio awesome.
AudioCupcake does one thing: it converts freshly edited raw narration WAV or AIFF audio files into MP3 audio files that meet the technical requirements of audiobook and podcast publishers, like Audible and ACX.
Is AudioCupcake free?
Yes. It is free to download, and to use forever. Should you decide to upgrade to the Premium version, there is a one-time fee of US$19.95.
Is AudioCupcake just like The Levelator?
Yes! The free version of AudioCupcake does exactly the same thing as the Levelator does. In fact, the reason AudioCupcake was created was because there was a period of time when The Levelator was not compatible with MacOS Catalina. Not being able to use The Levelator was frustrating to Mac users who were using Catalina, so we filled in the gap by creating AudioCupcake.
(Just so you know, we’re huge fans of The Levelator, and there is now a version that is compatible with Catalina (and subsequent versions of MacOS), and is available for free in the Mac App Store.)
The Premium version of AudioCupcake goes a couple of steps further and finishes the job: it will not only add appropriate RMS and peak normalization, but will also transcode your WAV files into 192k mono MP3 files, the very format ACX and other audiobook platforms require, and which work quite nicely for other categories of voice over work as well.
With what versions of MacOS does AudioCupcake work properly?
AudioCupcake is compatible with all versions of MacOS from Snow Leopard on, including:
- Snow Leopard (macOS 10.6)
- Lion (10.7)
- Mountain Lion (10.8)
- Mavericks (10.9)
- Yosemite (10.10)
- El Capitan (10.11)
- Sierra (10.12)
- High Sierra (10.13)
- Mojave (10.14)
- Catalina (10.15)
- Big Sur (macOS 11)
- Monterey (12)
- Ventura (13)
You can check to see what version of macOS you’re running by choosing About this Mac from the Apple menu.
Is there a Windows version of AudioCupcake?
No, AudioCupcake is Macintosh only software. We are assessing the demand for a Windows version and will create one if we determine it’s needed and wanted.
This software is for Macintosh users only, not for Windows users. It is meant in particular for audiobook narrators and podcasters who cannot install and use Levelator, usually because they’ve upgraded to MacOS Catalina. For Windows users, they should continue to use Levelator, as it still works on Windows.
What’s the difference between the free and premium versions of AudioCupcake?
You can run AudioCupcake one of two ways: in free mode, or in premium mode, with premium features unlocked.
FREE MODE: When users download AudioCupcake, it will operate on sound files in it’s “free” mode in exactly the same way as The Levelator app does: you drag a WAV or AIFF audio file onto it, and it will create a compressed, RMS Normalized file to ACX’s audiobook standards, as well as traditional podcasting standards.
You then will have to drag your compressed/RMS’d files back into your sound software for peak normalization and conversion to MP3, just as you have to do with The Levelator.
PREMIUM MODE: In addition, for a one time payment of US$19.95, you can unlock the premium features of the app, which not only applies the compression and RMS Normalization the free version does, but it goes further and does those two more things you’d normally use your sound sofware for, automatically:
- First, like the free version, AudioCupcake compresses your audio and then
- it RMS normalizes your file to between -18 and -23 dB, and then
- it peak normalizes the file to -3.0 dB, and
- it converts it to a 192k mono mp3 file, ready to upload to ACX and other platforms.
And it does it all from your single drag and drop of your raw edited audio files. It’s a huge time saver.
If you value your time at least $40 per hour, AudioCupcake will pay for itself in the first half-hour you don’t spend playing with your DAW to finish the mastering of your work, and you can move on to more performance.
How do I download and install AudioCupcake?
Downloading and installing AudioCupcake is quick and easy.
You can get the AudioCupcake installer by clicking on the AudioCupcake below. It’s absolutely free. You only pay for the Premium upgrade if you want to.
STEP 1: DOWNLOAD

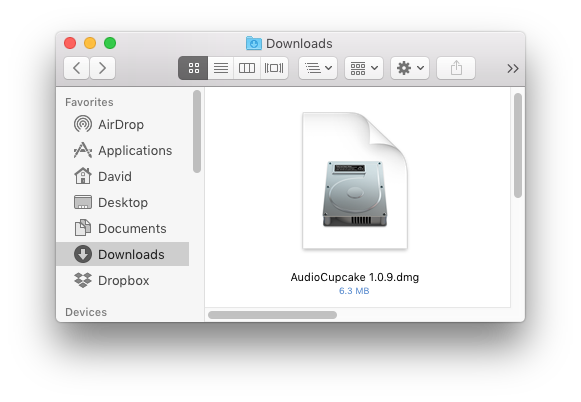
Your browser will download the file, named AudioCupcake #.#.#.dmg. The actual numbers in the file’s name will be the current version of the app and will vary over time..
This is your installer, not the actual app.
The installer .dmg file will be found in your Mac’s Downloads folder:
STEP 2: INSTALL
Double-click the .dmg installer file. You’ll then see this window:
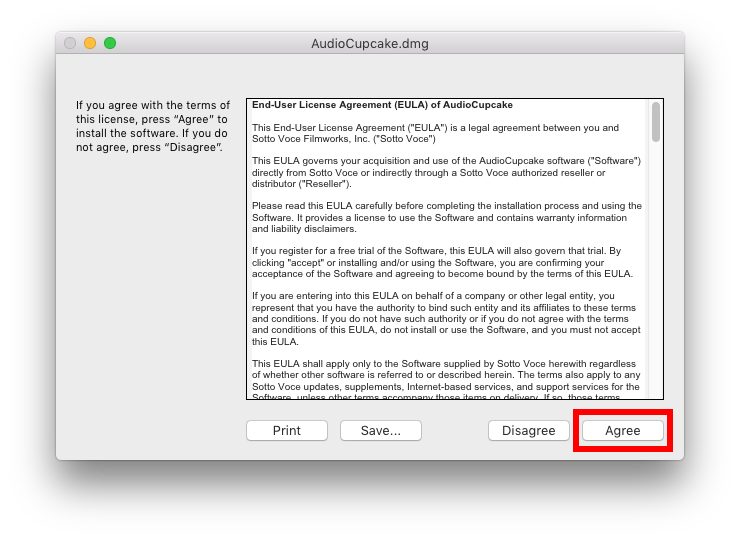
That’s your end-user license agreement (EULA). Click Agree, and you’ll see this next window:
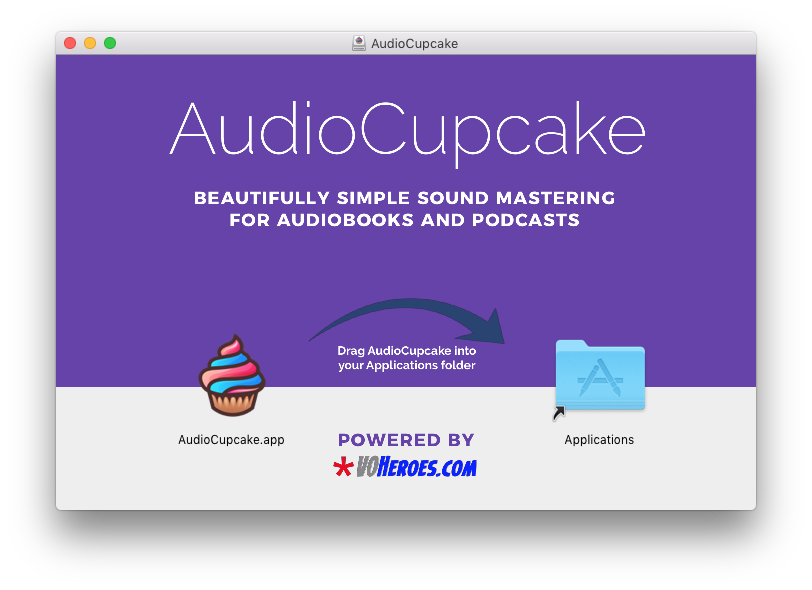
NOTE: You may just see the label of AudioCupcake (as opposed to AudioCupcake.app) below its icon. That’s just fine.
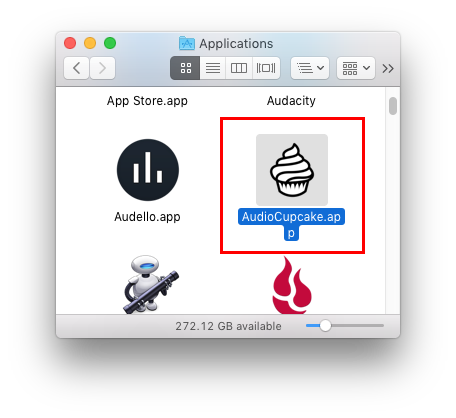
Now, move AudioCupcake to your Applications folder. And it’s as simple as following the directions shown in that window: drag the AudioCupcake.app item to the Applications folder item and when it lights up, drop it in. AudioCupcake gets copied to your Applications folder, which is exactly where it’s supposed to be.
NOTE: At some point, you may find that you have already installed AudioCupcake. If you already have, you’ll see this alert:
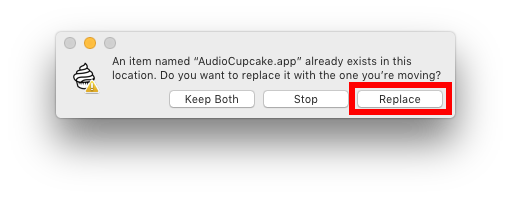
If you don’t want to replace AudioCupcake, click Stop. But usually, you’ll want to click Replace, especially if you’re upgrading to a newer version.
And that’s it. AudioCupcake is now installed. Close the installation window in which you just did your drag-and-drop – you don’t need that anymore.
NOTE: DO NOT RUN THE AUDIOCUPCAKE APPLICATION FROM THE INSTALLER WINDOW – DRAG IT TO THE APPLICATIONS FOLDER AS SHOWN ABOVE.
HOW AUDIO CUPCAKE WORKS (FREE AND PREMIUM)
You can run AudioCupcake one of two ways: in free mode, or in premium mode, with premium features unlocked.
FREE MODE: When users download AudioCupcake, it will operate on sound files in it’s “free” mode in exactly the same way as the Levelator app does: you drag a WAV or AIFF audio file onto it, and it will create a RMS Normalized file to ACX’s audiobook standards, as well as traditional podcasting standards. You then will have to drag your RMS’d files back into Audacity for peak normalization and conversion to MP3 as you had to do with Levelator.
PREMIUM MODE: In addition, for a one time payment of US$19.95, a user can unlock the premium features of the app, which not only applies the RMS Normalization the free version does, but it goes further and does those two more things you’d normally use Audacity for, automatically:
- AudioCupcake RMS normalizes your file to between -18 and -23 dB, and then
- it peak normalizes the file to -3.0 dB, and
- it converts it to a 192k mono mp3 file, ready to upload to ACX and other platforms.
And it does it all from your initial drag and drop of your raw edited audio. It’s a huge time saver.
If you value your time at least $40 per hour, the first 30 minutes you don’t have to be playing in Audacity to finish the mastering of your work, and you can move on to more performance, AudioCupcake will pay for itself.
And even more good news for you, current VOHeroes Pro/Pro Emeritus members and students of the ACX Master Class: the premium version of the app won’t cost you a dime. Remember, you have a coupon code we purchased for you so that you get those premium features at no cost. That coupon code will get you a license key that unlocks those premium features.
I’m one of David’s VO students. Do I get the premium version of AudioCupcake for free?
You likely do! A free copy of the Premium version of AudioCupcake is included with a VOHeroes Pro membership and with registration in the 2020 and beyond ACX Master Class, and for Lifetime members. Contact the admin of either class if you’re not clear on how to obtain your free copy.
How do I upgrade to the Premium version of AudioCupcake?
To upgrade to the Premium version of AudioCupcake, it needs to be running on your computer. Go to your Applications folder and double-click on the AudioCupcake icon to launch it for the first time. When you do, this screen may appear:
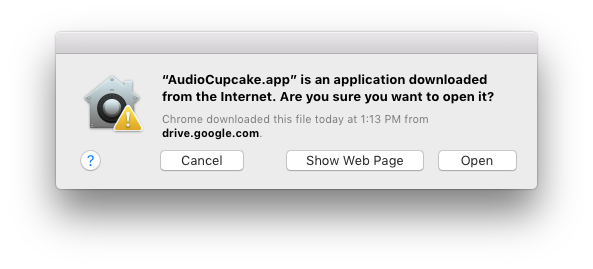
If that alert does appear, go ahead and click Open. Rest assured that AudioCupcake is vetted by Apple as a safe app to use.
Once AudioCupcake launches, you’ll be prompted to get the Premium version – just click on the Purchase Now button, and we’ll get you licensed.
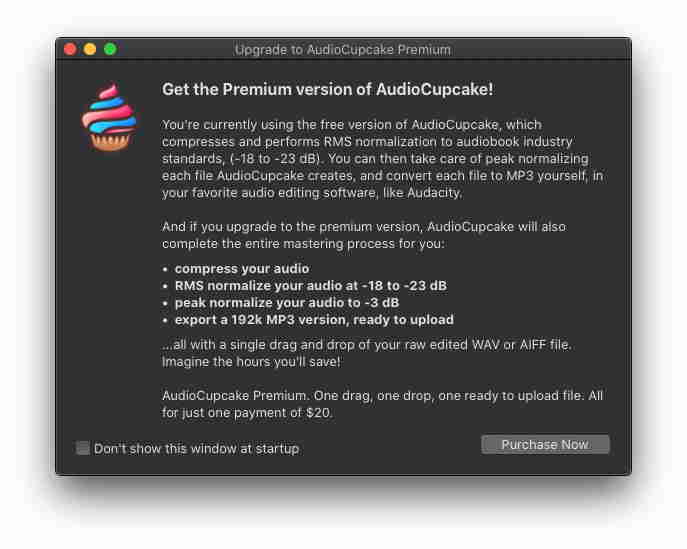
Then, you’ll see this screen, and even though you have a coupon code, it looks like it’s still asking you to purchase the app:
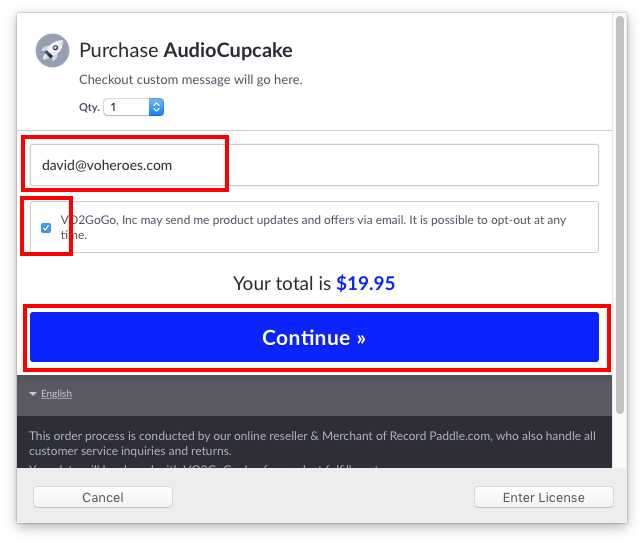
No worries. Just fill in your email address, check the box to allow us to email you updates, and then click the the big blue Continue >> button. You’ll then see this screen:
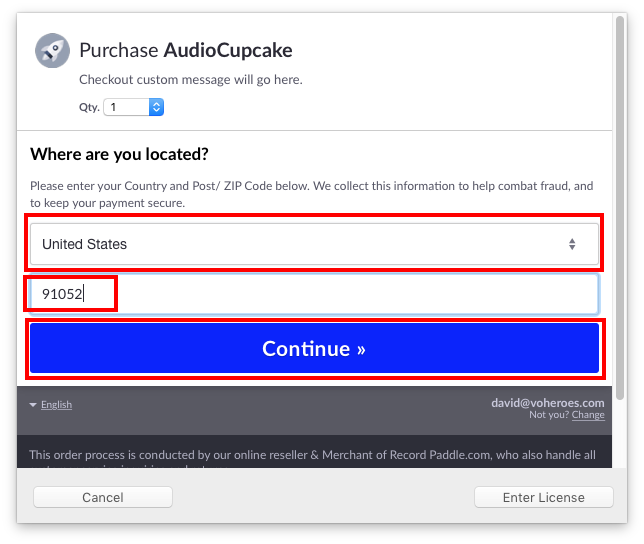
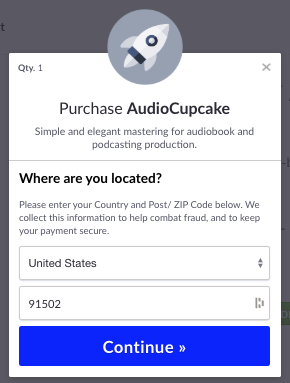
Choose your country and put in your ZIP or postal code. Then click the big blue Continue >> button, and you’ll see this screen:
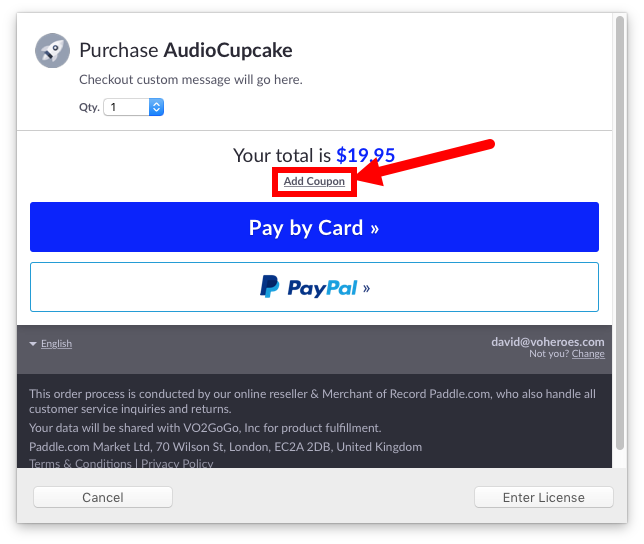
If you don’t have a coupon code, just choose how you want to pay, and proceed with the process. When you finish and have paid, your assigned license code will automatically be entered into your AudioCupcake application, and the Premium features will be unlocked.
If you have a coupon code, click on that little, tiny Add Coupon link below the price. Then, you’ll see this screen:
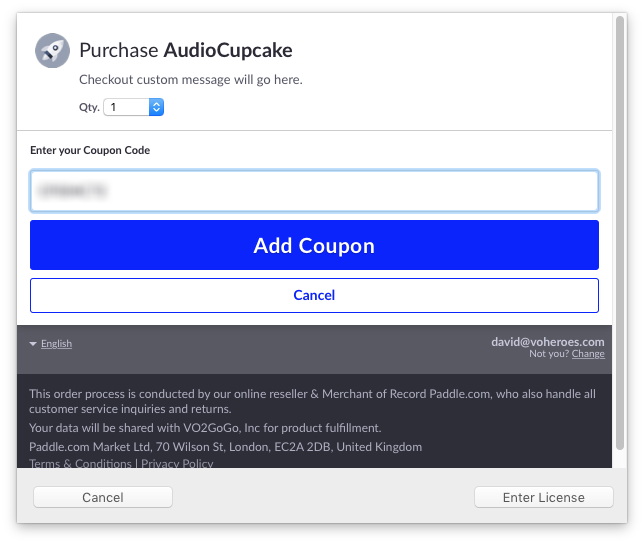
Copy and paste your coupon code in under Enter your coupon code. Then click on the big blue Add Coupon button. You’ll then see this screen, showing you the amount you now will be required to pay:
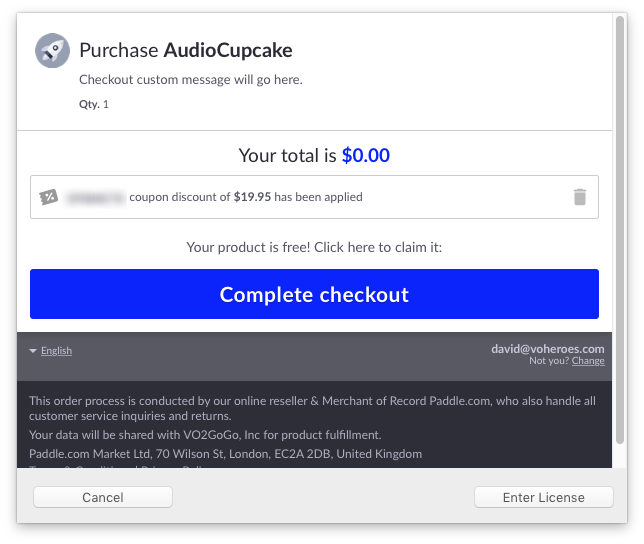
See there? The coupon code worked! Now, just click on the big blue Complete Checkout button. That will bring you to this screen:
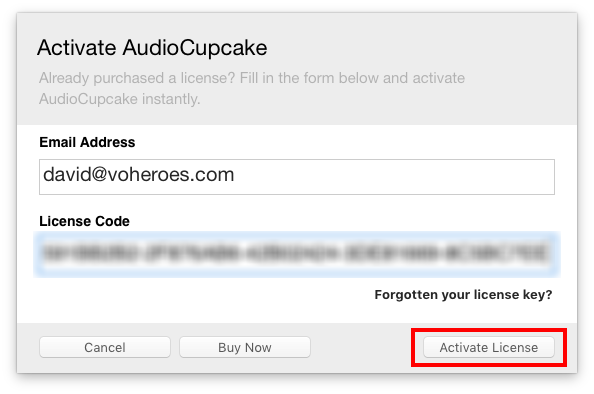
Success! You’ll see your new license key (and you’ll get an email with it as well so you can save it somewhere). Then click the Activate License button.
One last thing to do: quit and relaunch AudioCupcake, just to be sure the license is active.
And you’re done. AudioCupcake has been upgraded to Premium.
I just got a new Mac. How do I enter a license code I already have to upgrade to the Premium version of AudioCupcake?
Download and launch AudioCupcake on your new Mac. Once AudioCupcake launches, you’ll be prompted to get the Premium version – just click on the Purchase Now button:

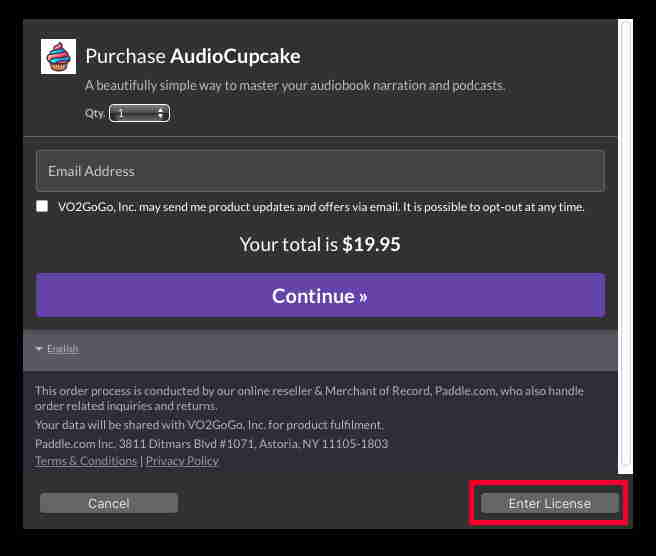
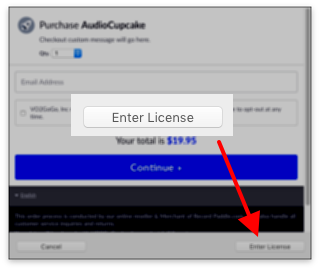
On the screen that appears next, just click on the Enter License button:
Then, on the next screen, enter the email address you registered with and the license key you already have from your older computer::

Then click the Activate License button.
One last thing to do: quit and relaunch AudioCupcake, just to be sure the license is active.
And you’re done. AudioCupcake has been upgraded to Premium on your new Mac.
How do I use AudioCupcake?
The moment you license the premium features of AudioCupcake, this window will appear:

Just drag your edited raw WAV or AIFF file on top of that window and drop it. It will turn BLUE if all is well, and RED if there’s a problem with your file. If you’re dragging multiple files and there’s an issue with one of them, it will turn ORANGE. If it’s RED or ORANGE, you have to correct your files.
Once AudioCupcake is finished, you’ll find a new file in the same folder as your original raw file, depending upon whether you’re using the free version or the premium version.
- If you’re using the FREE version of AudioCupcake, the new file will have (RMS) appended to the file name. You’ll need to further prepare that file by bringing it into Audacity and using Normalization at -3.0 dB, then exporting it to a 192k mono MP3 file in Audacity before you upload that MP3 file to ACX.
- If you’re using the PREMIUM version of AudioCupcake, the new file will have .mp3 as its filename extension, and it will be fully prepared, ready for upload to ACX.
- NOTE: For safety’s sake, the current version of the app also saves two files in addition to the original WAV or AIFF files: one that is the RMS normalized file, with (RMS) is added to the file name, and another that is also peak normalized, with (RMS+Peak) added to its filename. You can safely delete those files.
And that’s it!
Here’s a quick video demo of AudioCupcake’s premium features (feel free to go full screen):
What are all those extra file AudioCupcake creates, and how do I get rid of them?
You usually are only looking for the final MP3 file – and the premium version of AudioCupcake gives you that MP3 by processing your raw WAV or AIFF file in 4 different steps, creating a new version of your audio for each of the steps:
- The file labeled COMP is the compressed version of your audio. That’s the first step.
- The file labeled COMP+RMS adjusts for a RMS normalization of between -18 and -23 dB.
- The file labeled COMP+RMS+Peak is then adjusted for a peak normalization of -3.0 dB (created for Premium users only).
- The file labeled MP3 is the 192k MP3 version of the COMP+RMS+Peak file (created for Premium users only).
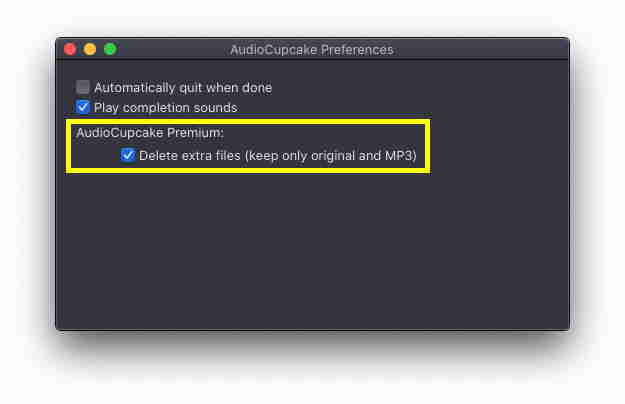
If you want to have AudioCupcake “clean up after itself” when in Premium mode, and delete those interim files when it’s finished processing (leaving only the MP3 file), select that in AudioCupcake >> Preferences, as shown below:
DO YOU HAVE ANY OTHER QUESTIONS?
If your question wasn’t answered by the items above, send any other questions about AudioCupcake to help@audiocupcake.com. We’ll get back to you as soon as we can.
EVERYTHING BELOW, INCLUDING THIS, IS HIDDEN (VISIBILITY SETTINGS)
Step 2: Enter your country and location.
Step 3: Locate and click on the tiny Add Coupon link.

Step 4: Copy and paste your coupon code from the class email.
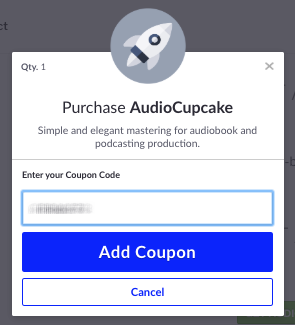
Step 5: Behold the results of following these directions. It’s now free.
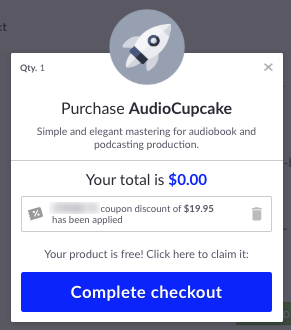
Step 6: Behold the results of your coupon expertise. It’s now free.
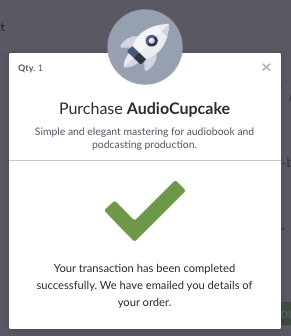
Step 7: Open one of the emails you just got from Paddle.
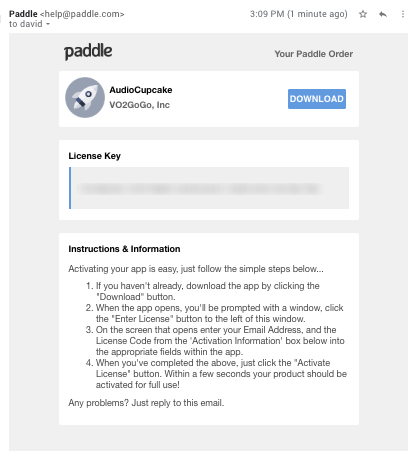
Note that there are two important parts to this email: your download button (click that to download the ZIP file containing your AudioCupcake app) and your license key (get ready to copy that into the app). Once you’ve clicked on the download button, go to your Downloads folder.
Step 8: Locate the downloaded ZIP file in your Download folder.
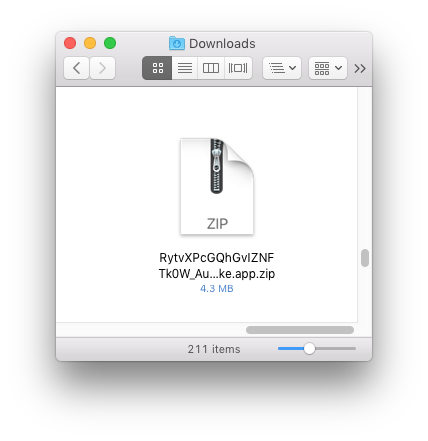
Step 9: Drag the app into your Applications folder.
Step 10: Click on the Enter License button.
Step 11: Copy and paste the license key from your email message.

